Hot water problems have a way of showing up at the worst possible times. The water is either not hot enough to be useful, scalding when you barely twist the tap, or it runs out twice as fast as it used to. Before you call a plumber and start bracing for a big repair bill, it is worth checking the thermostat first. A surprising number of hot water problems trace back to a thermostat that has drifted out of calibration, been set incorrectly, or simply failed after years of use.
Knowing how to check the thermostat on a hot water heater is one of those practical skills that can save you real money, and in most cases it does not require any specialized tools beyond a screwdriver and a multimeter you can pick up at any hardware store. This guide walks through the full process for both gas and electric units, explains what normal looks like, and covers what to do when the thermostat turns out to be the actual problem.
Checking the thermostat on an electric water heater involves turning off the power at the circuit breaker, removing the access panel, and using a multimeter to test whether the thermostat is reading temperature correctly and sending power to the heating element when it should. On a gas water heater, the thermostat is integrated into the gas valve assembly and is tested differently, mainly by checking output temperature and observing whether the burner cycles on and off appropriately. If your water is consistently the wrong temperature or the unit runs constantly without reaching the set temperature, a faulty thermostat is a likely cause.
What the thermostat actually does
Before getting into the testing process, it helps to know what you are working with. On an electric tank water heater, there are typically two thermostats: an upper and a lower. Each one controls a separate heating element. The upper thermostat acts as the primary controller. When water at the top of the tank is cold, the upper thermostat activates the upper element first. Once the top portion is up to temperature, control transfers to the lower thermostat, which handles the larger volume of water in the bottom half of the tank.
On a gas water heater, the thermostat is built into the gas valve, which is the control unit mounted on the front of the unit near the bottom. You cannot separate the thermostat from the gas valve on most residential units. When people talk about a gas water heater thermostat problem, they usually mean the gas valve assembly needs attention or replacement.
Most people set the thermostat once during installation and never touch it again. That is generally fine, but over years of use thermostats can drift, fail to read temperature accurately, or stop switching the element on and off at the right times. When that happens, the symptoms range from lukewarm water to scalding output to a unit that runs the element almost constantly without ever satisfying demand.
What you will need
For testing an electric water heater thermostat, you will need a flathead screwdriver, a multimeter set to voltage or resistance depending on the test, a non-contact voltage tester for safety, and a kitchen or infrared thermometer to verify actual water output temperature. Work gloves are a good idea, not because the thermostat itself is dangerous when the power is off, but because the insulation inside the access panel can be itchy fiberglass. For a gas unit, you mostly need the thermometer and some patience to observe the burner behavior.
How to check the thermostat on a gas water heater
Gas unit thermostats are integrated into the gas valve and are not directly testable with a multimeter the way electric thermostats are. Instead, you assess them through their behavior and the output temperature.
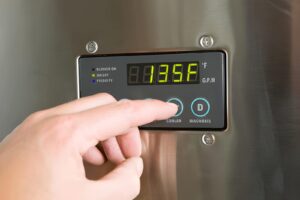
Step 1: Check the actual water temperature. Run the hot water at a tap for two to three minutes to clear out any cooled water sitting in the pipes. Fill a glass and use a thermometer to measure it. The temperature at the tap should be within about 5 degrees Fahrenheit of the thermostat setting. If the dial is set to 120 degrees and your water is coming out at 90 degrees, the thermostat is either set incorrectly or reading tank temperature inaccurately.
Step 2: Observe the burner cycle. Look through the small viewing window on the front of the unit near the base. After you have used enough hot water to trigger heating, you should see the burner flame come on within a few minutes and burn steadily until the tank reaches temperature, then shut off. If the burner never comes on even when the tank should be cold, the thermostat is likely not sending the signal to open the gas valve. If the burner stays on continuously and the water gets excessively hot, the thermostat may be stuck open.
Step 3: Try adjusting the dial. Turn the dial up slightly and listen for a click, which indicates the gas valve responding to the new setpoint. Then turn it back down past the current temperature and listen for another click as it shuts off. If there are no clicks at all, the thermostat mechanism inside the gas valve is probably no longer functioning.
A faulty gas valve with an integrated thermostat typically needs full replacement. On most residential units, you cannot replace just the thermostat portion. This is a job for a licensed plumber or gas technician since it involves working directly on a gas line. Replacement gas valves cost $150 to $350 for the part, and professional labor typically adds $150 to $250, putting total repair cost at $300 to $600 in most U.S. markets.
How to check the thermostat on an electric water heater
This process takes a bit more care because you are working near a 240-volt circuit, but as long as you confirm the power is off before touching anything, it is manageable for most homeowners.
Step 1: Turn off the power. Go to your electrical panel and switch off the circuit breaker dedicated to the water heater. Most electric water heaters run on a 240-volt circuit. Use a non-contact voltage tester near the wires at the access panel to confirm there is no live current before proceeding. Do not skip this step.
Step 2: Remove the access panels. There are usually two panels on the side of the tank, one near the top and one near the bottom. Use a flathead screwdriver to remove them. Behind each panel you will find a layer of insulation and then the thermostat and heating element.
Step 3: Check the temperature setting. Before testing anything electrically, just look at where the thermostats are set. Both the upper and lower thermostats should be set to the same temperature, typically 120 degrees Fahrenheit. A surprisingly common issue is that someone adjusted one thermostat but not the other, creating inconsistent heating behavior. Mismatched settings often explain why the first part of a shower is fine but the rest is disappointing.
Step 4: Test the thermostat with a multimeter. Set your multimeter to measure continuity or resistance. Disconnect the wires from the thermostat terminals, noting where each wire connects so you can reattach them correctly. Touch the multimeter probes to the terminal screws. A functioning thermostat should show continuity when the water temperature is below the set point and no continuity when it is above. If the thermostat shows no continuity at all regardless of temperature, or shows continuity constantly, it has failed.
Step 5: Test with power restored briefly. If you want to confirm whether the thermostat is sending power to the element when it should, restore power at the breaker only long enough to take readings. Set your multimeter to AC voltage. With the probes on the element terminals, you should see roughly 240 volts when the thermostat is calling for heat. If the thermostat is set correctly, the tank water is cold, and you are reading zero volts at the element, the thermostat is not passing power through. Turn the breaker off immediately after taking this reading.
Step 6: Verify water output temperature. Even if the thermostat tests fine electrically, run a temperature check at the tap after the unit has had time to heat fully. If the output temperature is significantly lower than the thermostat setting, the thermostat may be reading tank temperature inaccurately due to poor contact with the tank wall or internal calibration drift.
How to replace a thermostat on an electric water heater
If testing confirms the thermostat has failed, replacement is a relatively straightforward repair. Electric water heater thermostats are not universal, so you will need to match the replacement to your unit’s voltage and wattage ratings. The model information is on the label on the side of the tank. Replacement thermostats for standard residential units cost $15 to $40 each, and you can usually find them at any hardware or plumbing supply store.
With the power confirmed off at the breaker, disconnect the wires from the failed thermostat, note their positions, then use a flathead screwdriver to press the release tab and slide the old thermostat out of its bracket. Slide the new one in until it clicks firmly against the tank wall, an important step since the thermostat relies on direct contact with the tank surface to read water temperature accurately. Reconnect the wires exactly as they were, replace the insulation and access panel, and restore power at the breaker. Give the unit 60 to 90 minutes to run a full heating cycle, then check the output temperature at the tap.
Having a plumber do the replacement typically costs $100 to $200 in labor, added to the cost of the part. If both thermostats are more than seven or eight years old and one has failed, it is worth replacing both at the same time since the labor cost is essentially the same regardless.
When to call a professional
You should call a licensed plumber or electrician if you are not comfortable working with electrical systems, if the breaker trips repeatedly when the water heater is running, if you find any signs of burning or melted wiring near the thermostat or element, or if replacing the thermostat does not solve the problem and the element may also need replacement. A service call for diagnosis typically runs $75 to $150. If both the thermostat and element need replacing on an electric unit, combined repair cost usually falls between $200 and $350 installed.
On a gas unit, any work involving the gas valve should be handled by a qualified technician. Working on gas lines without the right training and tools is genuinely risky and not worth attempting as a DIY project.
Common mistakes to avoid
The most common mistake people make when dealing with hot water problems is replacing the heating element immediately without first checking whether the thermostat is actually working. Elements get replaced unnecessarily all the time when the real issue is a thermostat that is not sending power to a perfectly functional element. Testing before replacing saves money and time.
Another mistake on electric units is replacing only one thermostat when both are the same age and one has already failed. The surviving thermostat is often not far behind, and doing the job twice costs more in labor than doing it right the first time. That is just where things tend to go wrong with a reactive rather than proactive approach.
A third issue is reinstalling the thermostat without pressing it firmly against the tank wall. If it sits slightly off the surface, it reads ambient air temperature rather than the actual tank temperature, which causes erratic behavior and makes the unit run the element more than necessary.
What it typically costs overall
Testing by a plumber runs $75 to $150 for the service visit. Thermostat replacement parts cost $15 to $40 each. With professional labor, a single thermostat replacement runs $100 to $200 total. Replacing both upper and lower thermostats together typically costs $150 to $275 installed. If the diagnosis reveals the element also needs replacement, add $150 to $300 for that repair combined with the thermostat job. For gas units where the full gas valve assembly must be replaced, total cost lands between $300 and $600 depending on location and labor rates.
Read more: How long does a water heater take to heat up
Knowing how to check the thermostat on a hot water heater puts you in a much better position the next time your hot water starts behaving oddly. In a lot of cases, the fix is as simple as a thermostat adjustment or a $25 part. The key is testing methodically rather than guessing, because replacing parts that do not actually need replacing adds up fast. If the thermostat checks out fine and the problem persists, the heating element is the next logical suspect, and the same careful approach applies there too.